 Before we go further, add a Split Container control to your screen and change its orientation to horizontal, set dock to fill.
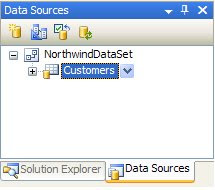
NorthwindDataSet is the name of the dataset that was created for you, and Customers is the table within the DataSet. While the setting can be changed, it is important to know that .NET has built and is maintaining all of the connections, adapters etc. so you don't have to.
- NorthwindDataSet
- CustomersBindingSource
- CustomersTableAdapter
- TableAdapterManager
- CustomersBindingNavigator
Personally I hate the toolbar that automatically appears at the top of the screen and delete it immediately but for now we will let it live.
Click Run to make sure everything looks good. I run my project often, that way if something isn't working I know what the most likely culprit is. If everything looks good and the datagridview is full of data then continue on, if not start over.
Right-click your form and select view code. You will see that some code has been automatically generated for you. Under the Load you will see something like:
Me.CustomersTableAdapter.Fill(Me.NorthwindDataSet.Customers)
This is what fills the dataset, it is set to do it on load, but you can move it anywhere you want so you can, say, load it on the click of a button. More on TableAdapters soon, but first notice that the system also generated some save code for you. This is tied to the toolbar back on your form, but you can use this code wherever you need it.
TableAdapter
This thing was very confusing to me at first but I think I can explain it rather easily now. Datasets contain tables, and these tables are filled with records that can be updated, inserted or deleted. The TableAdapter allows you to do this. Why use the TableAdapter instead of just manipulating the table directly? Because the TableAdapter is designed to handle everything for you, it manages primary and foreign key relationships, cascading updates and deletes, and perhaps the best of all it handles all of the locking and unlocking of records letting multiple users update the database simultaneously without fear of screwing up stuff, and without you programming it all in.
Lets look under the hood. Go to your form and right-click on your TableAdapter and select "Edit Queries in DataSet designer...", this opens another tab with a visual representation of your tables. This is an important place to get familiar with, if you manage your table relationships here then you can cobble together queries and tables that suit your needs and which .NET knows how to update. With this, you can choose update and .NET knows where all of the data goes, if you don't do it this way then you have to pull apart queries into their underlying tables and then update the data manually. That is a no-no.
Right-click on the fill portion of the TableAdapter and select "Configure...":
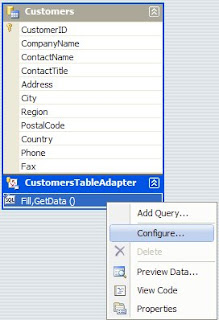 Here you will see the Select statement that is being used to pull the data, we will look more in-depth at this later, just know that this is where you can customize what gets pulled and loaded into the dataset. The "Query Builder" button lets you build the query just like you would in access, very handy. Right-Clicking the fill portion again and choosing "Add Query..." will let you build your Insert, Delete and Update statements.
No comments:
Post a Comment